We had a really good time at the 3-hour glass fusion workshop in the Haddenham Arts Centre last weekend. We were taught by Sarah Hunt, a lovely lady who is predominantly a stained glass artist (and a ceramicist prior to that), but who has gone on to embrace the art of glass fusion too.
There were 9 of us in total. A very friendly bunch. Sarah was surprised that we were all novices, as she often has returning students on her workshops and who have already attended a class with her before. So we were all very much starting on the same page, which was nice.
Sarah gave us a warm welcome, introduced herself and then told us about the array of tools we found before us on our workbenches.
 |
| Various tools required for glass fusion |
We started off with practice cuts on a small piece of glass. This gave us the chance to get used to the way the glass breaks after being scored and a little pressure applied around the score at the edge of the glass. Sarah explained how important it is to wear the safety goggles at all times, as the smallest pieces of glass could go flying! It's also necessary to keep your work area clean at all times; sweeping up all the little bits as you go along.
 |
| Our practice cuts |
Having practised scoring and cutting the glass, Sarah then explained about all the different types of glass and also other materials we could use to create our pieces. You can use flat sheets of glass, flakes, long thin sticks, beads, millefiori beads (like little flowers) ...
 |
| Different types and colours of glass - like a sweet shop! |
We had a lovely range of colours to choose from, and Sarah explained how some of the glass would fire to the colour it is now, while others would tend to have a different colour after firing.
 |
| You can also add wire and glass fibres to your pieces |
It was interesting to see that you can also add wire, metals, mesh, glass fibres etc. to your pieces, but as these are not glass, they must always have a piece of glass on top of them in order for them to fuse into the piece.
 |
| Some of Sarah's pieces |
Sarah showed us some of the pieces she had made which demonstrated how the glass would melt. She also explained about using window glass and making pieces that are indented with glass fibre shapes from beneath the piece.
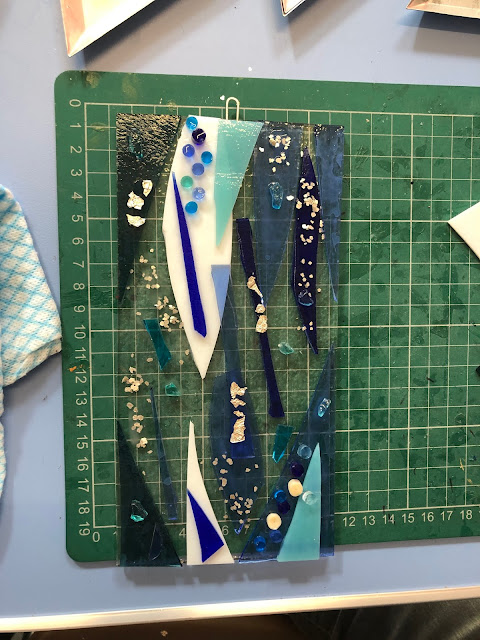
Armed with all this information and some differently sized blank pieces of base glass to choose from, I (Louise) decided I'd go for a largish wall hanging first and chose my favourite go-to palette of blues and "ocean" colours. I didn't design anything on paper, I just went for it and started placing the pieces of glass on the base. Once I was reasonably happy, I then glued them down. You have to glue the glass pieces down to keep them in place. The glue fires away in the kiln, so there's no residue or anything left behind.
 |
| The beginnings of my "ocean" piece |
If you're making a wall hanging or pendant, you do have to remember to include a hook or something to hang the piece on. The hooks are glued to the base and then a piece of glass (which could be part of your design) is used to cover the top of the hook so that it will fuse and sandwich into the glass when the glass melts in the kiln.
 |
| Finished piece, ready for firing |
Zakiya chose a really beautiful palette of greens for her first piece - a coaster. She went for a lovely abstract block design, just perfect for coasters as it's level and highly effective.
 |
| Zakiya's beautiful coaster in greens |
Time seemed to fly by, but having completed our first pieces we still had plenty of time to make numerous little pendants in varying colours and designs.
 |
| Zakiya's pendant |
 |
| Zakiya's pendant decorated with gorgeous glass flakes |
 |
| I decided to get my hooks on all the pendants first |
 |
| I went for a simple theme of blue stripes here |
 |
| I love Zakiya's red and amber combination here |
Having completed our pieces, we were each given a tray on which to put them and in readiness for Sarah to take home with her to fire later.
We can't wait to see how they've turned out, and we'll be heading over to the Haddenham Arts Centre on Saturday to collect them! We'll be sure to show you the results in a further blog!
The Haddenham Arts Centre and gallery is a wonderful find! The studio where we attended the workshop itself is just part of the complex. You're met with a beautiful array of various local arts and crafts in the gallery shop, and they even have a tea room (where Zakiya and I had lunch after the workshop). It's definitely worth a visit! Check out the links below for more information.
It's really worth taking a look at Sarah's website. She's a very talented lady and you'll see some of her amazing stained glass pieces there. Sarah also runs one-day courses at her home in Willingham. She has a very gentle and informative teaching manner, and Zakiya and I will definitely be attending one of her classes again.
Keep crafting x
Our Etsy shop
Our YouTube channel
Haddenham Arts Centre Facebook
Sarah Hunt website
Disclaimer: we are not sponsored by any companies we mention, nor are any of these links affiliate links. The links are purely for your convenience if you are interested in anything we try or show you.
Comments
Post a Comment