Hi guys!
As Easter is just around the corner, we decided to create an Easter basket, filled with all things crafty and chocolatey. This could be used as a gift for someone, or you could make the individual items and use them as decorations around your home this season.
Most supplies needed for this project can be found at Hobbycraft and the sequins are from the littlecraftybugs company (specific links to each product can be found at the bottom of this post).
So, let's jump right in.

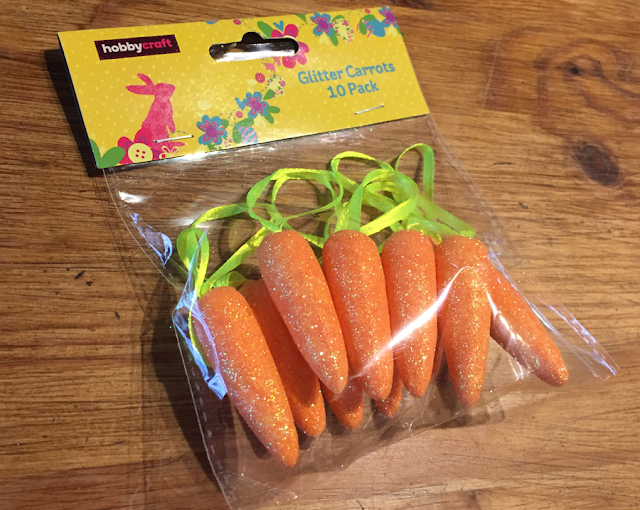
As you'll see at the end of this post (and in the video), I used these carrots to dot about the basket to add even more decoration.


As Easter is just around the corner, we decided to create an Easter basket, filled with all things crafty and chocolatey. This could be used as a gift for someone, or you could make the individual items and use them as decorations around your home this season.
Most supplies needed for this project can be found at Hobbycraft and the sequins are from the littlecraftybugs company (specific links to each product can be found at the bottom of this post).
So, let's jump right in.

This cute basket was the perfect container for all the crafty goodness!

As you'll see at the end of this post (and in the video), I used these carrots to dot about the basket to add even more decoration.

I purchased all of the découpage supplies from Hobbycraft.

Sequins were purchased from the littlecraftybugs company.

The sequins and pins are ready to use, and I started to attach them already in this shot. If you want to purchase the boxes I use to store these in, check the 'Where to buy' section at the bottom of this post.

Pretty obviously, I started with a blank styrofoam egg.

Then, using the pins and your chosen colour of sequin you attach them to the egg, making sure you keep the cup side of the sequin facing upwards.

Keep going and going...

Until you have your beautifully shiny, finished egg.

The colours you use are entirely up to you of course, and I chose to do mainly solid colour eggs, but of course, you can mix-and-match with multiple colours on the egg if you wish.

Once you've finished your sequin art eggs, it's time to move on.

On to the washi tape eggs now. As seen before, I started with a blank egg and my chosen washi tape design.

This is very simple (and a lot quicker than the sequined eggs). You just need to tear off strips of the tape and stick them on to the egg. I will say, some washi tape doesn't stick very well to the styrofoam, so choose a very sticky tape!

With the tape I used, the finish wasn't as smooth as I would have preferred, but I really liked the effect in the end.

Now, on to découpaging the basket!

Start by cutting out random small(ish) shapes from the decoupage paper. I used mostly rectangles but really, any shape will work.

Now, all that needs to be done is to start sticking! Just dip the brush into the glue and go to town. Make sure to cover the entire basket and don't forget to give it one last once over when it's completed, to ensure a high-shine finish.

This is what mine looked like once it had dried.

I decided to fill the basket with some straw-coloured raffia, and added chocolate eggs and bunnies to the top to finish it off.
Below, you can find a video of me découpaging the basket.
Now, before it's time to put everything into the chick basket, we need to paint some eggs!

I used acrylic paint and watered it down a lot so it bled through the styrofoam, but for your Easter creation do whatever you wish!

TIP: use a cocktail stick to make it easier to hold the eggs while painting and drying. I used a random paintbrush (nothing special) and dabbed the paint on in a rough pattern.

I used a corner of an egg carton to stick the eggs in while they dried. I left them overnight but, in reality, it probably only takes an hour or two to dry.

At this point, I had finished everything I wanted to make for this basket. You may want to do more (or less), which would look great too.

I placed all the components I'd created into the basket (after adding some more straw-coloured raffia of course!). Check out the video below to see the process:
After that, I just wrapped the whole lot in acetate and tied a nice big bow around it with green and straw-coloured raffia to top it all off.

Et voila!
Keep crafting x
Keep crafting x
Where to buy:
Pins for sequins
Really Useful Boxes Organiser 16 x 0.14 litres (storage I use for my sequins and pins)
Really Useful Boxes Organiser 16 x 0.14 litres (storage I use for my sequins and pins)
Decopatch Dark Green Crackle Paper (découpage paper)
Craft Smart Craft and Stencil Brush Set 8 Pieces (découpage brushes)
Mod Podge Gloss Finish (découpage glue)
Unfortunately, I couldn't find a link to the découpage basket or for the chick basket. If anyone finds one, please do let me know.
Our Etsy shop
Our YouTube channel
Disclaimer: We are not sponsored by any companies we mention, nor are any of these links affiliate links, nor are we trying to sell you anything. The links are purely for your convenience if you are interested in anything we try or show you.
Comments
Post a Comment